Table of contents
Before you even dream of hitting that big red record button, let's talk about the real make-or-break moment for your how-to video: the planning phase. Seriously. The success of your video is pretty much decided before any camera gear comes out of the bag.
Creating a how-to video that actually connects with people isn't just about showing a series of steps. It's about strategically solving a real problem for a specific person. Getting this blueprint right is the most critical thing you'll do.
If you skip this part, you're just guessing. You might create a video that nobody is searching for, that doesn't teach anything useful, or worse, that does absolutely nothing for your business goals. A bit of strategy upfront saves a ton of wasted time and money down the road.
The Strategic Blueprint for Effective How To Videos
Find Topics Your Audience Actually Needs
The best video ideas won’t come from a brainstorming session in a quiet boardroom. They come directly from your audience's real-world questions and frustrations. Your job is to become a detective and figure out what problems they're desperate to solve.
So, where do you look?
- Customer Support Tickets: Your support team is sitting on a goldmine of video ideas. What questions are they answering over and over again? Each one of those is a perfect how-to video just waiting to be made.
- Sales Team Feedback: What are the common hangups or "I don't get it" moments during sales calls? A video can clear up that confusion, educate prospects, and make your sales team's job a whole lot easier.
- Social Media and Community Forums: Jump into places like Reddit, Facebook groups, or industry forums. Keep an eye out for phrases like "how do I..." or "can someone explain..." that relate to what you do.
Imagine you're a mortgage broker. You notice people are constantly getting tripped up by closing costs. Boom. That's your next video: a detailed, line-by-line breakdown of the closing document. You’ve just become their trusted guide.
Set Clear Learning and Business Objectives
Every single video you create needs to serve two masters: a learning objective for your viewer and a business objective for you. Nail these down from the start, and you'll have a clear path and a way to know if you've actually succeeded.
The learning objective is your promise to the viewer. When they finish watching, they should feel confident they can do the thing. It's a tangible skill or piece of knowledge they walk away with.
A well-defined content strategy begins with robust planning. For video content, this often includes learning how to create your YouTube content calendar template easily to organise your ideas and align them with your business goals.
At the same time, what's in it for your business? Are you trying to get more leads? Grow your email list? Maybe you want to reduce customer churn. Your video’s call to action needs to point directly at that goal.
Let's see it in action:
- Company: A small business accounting software firm.
- Video Topic: How to set up and run your first payroll.
- Learning Objective: The viewer will feel totally confident adding employees, setting pay schedules, and processing their first pay run.
- Business Objective: Cut down on payroll-related support calls by 20% and see a boost in user retention in the first 90 days.
This kind of thinking elevates what you're doing. You're no longer just "making videos." You're building a library of strategic assets that deliver real, measurable value. It’s the difference between content that just sits there and content that actually works.
Scripting Your Video for Maximum Clarity and Impact

Let's be honest, a great video script is the unsung hero of any how-to video that actually works. It's what separates a clear, confident tutorial from one that leaves viewers even more confused than when they started. Thinking through your script first stops you from rambling, makes sure you hit all the critical points, and ultimately, respects your audience's time.
But scripting isn't about being rigid or killing your on-camera personality. Quite the opposite, really. When you have a solid plan, you're free to be more present and engaging during filming because you aren't scrambling to remember what to say next. It’s about creating a simple roadmap that guides both you and your viewer to the finish line.
Choosing Your Scripting Style
There's no one "right" way to write a script. The best method is whatever helps you deliver your message clearly and authentically. Your personality and how complex the topic is will naturally point you in the right direction.
Here are a few common formats to consider:
- Word-for-Word Script: This is where you write out every single word, pause, and even where you plan to take a breath. It’s perfect for highly technical topics where every detail matters or if you're a bit nervous on camera and want that extra safety net. The trick is to write it like you talk, so it doesn't come out sounding robotic.
- Detailed Outline: Think of this as a structured list of bullet points. You'll map out your key talking points, specific phrases you want to use, and the overall flow of the video. It gives you a strong framework but leaves room for you to improvise, making it a fantastic middle ground for most creators.
- Key Talking Points: If you know your topic inside and out and feel totally at ease on camera, a simple list of key ideas might be all you need. This approach gives you the most freedom and can feel incredibly natural. Just be sure you know your subject well enough not to miss anything important.
For example, an accountant breaking down a new tax law would probably lean towards a word-for-word script to guarantee accuracy. On the other hand, a car detailer showing a polishing technique would likely do great with a detailed outline that lets their hands-on expertise take centre stage.
Structuring Your Script for Engagement
A well-structured script has a natural flow that grabs attention, delivers real value, and wraps up nicely. It’s like telling a mini-story where the viewer is the hero who walks away with a new skill.
Make sure your structure has these core parts:
- The Hook: Kick things off with a question or a problem your viewer can relate to. Something like, "Tired of your car's paint looking dull no matter how much you wash it?" This instantly tells them they're in the right place.
- The Core Content: This is the heart of your tutorial. Break the process down into logical, easy-to-follow steps. Present them in order and, most importantly, explain the why behind each action.
- The Summary and Call to Action: Quickly recap the main steps to help the information stick. Then, tell the viewer what to do next. This could be anything from downloading a checklist to booking a consultation or watching another one of your videos.
The real goal here is to answer your viewer's questions before they even have a chance to ask them. When you anticipate where they might get stuck and address it in the script, you create a tutorial that feels both incredibly thorough and effortless to follow.
The Australian market for how-to content isn't just big; it's smart. A report from IAB Australia showed that 85% of Australians watch video content every week, which means there's a massive audience waiting for your instructional videos. What’s more, 59% of professionals agree that telling a story across multiple screens is the best way to keep people engaged. This really drives home the need for authentic, narrative-driven scripts that truly connect.
Writing How You Talk
The most common mistake people make when scripting? Writing for the eye, not the ear. Formal language, long-winded sentences, and corporate buzzwords will make your video feel stiff and hard to watch.
A simple fix: read your script out loud as you write it. If it sounds clunky or like something you'd never actually say in a conversation, rewrite it.
Use simple words, contractions (like "it's" or "you're"), and a friendly tone. This builds a connection and makes your information much easier to digest. People connect with people. If your audience feels like they're learning from a trusted expert, they’re far more likely to stick around, learn something, and take action. This human connection is especially crucial in formats that build trust, a concept we dive into in our guide on effective testimonial video production. By scripting with a conversational voice, you’re not just making how-to videos; you’re building relationships.
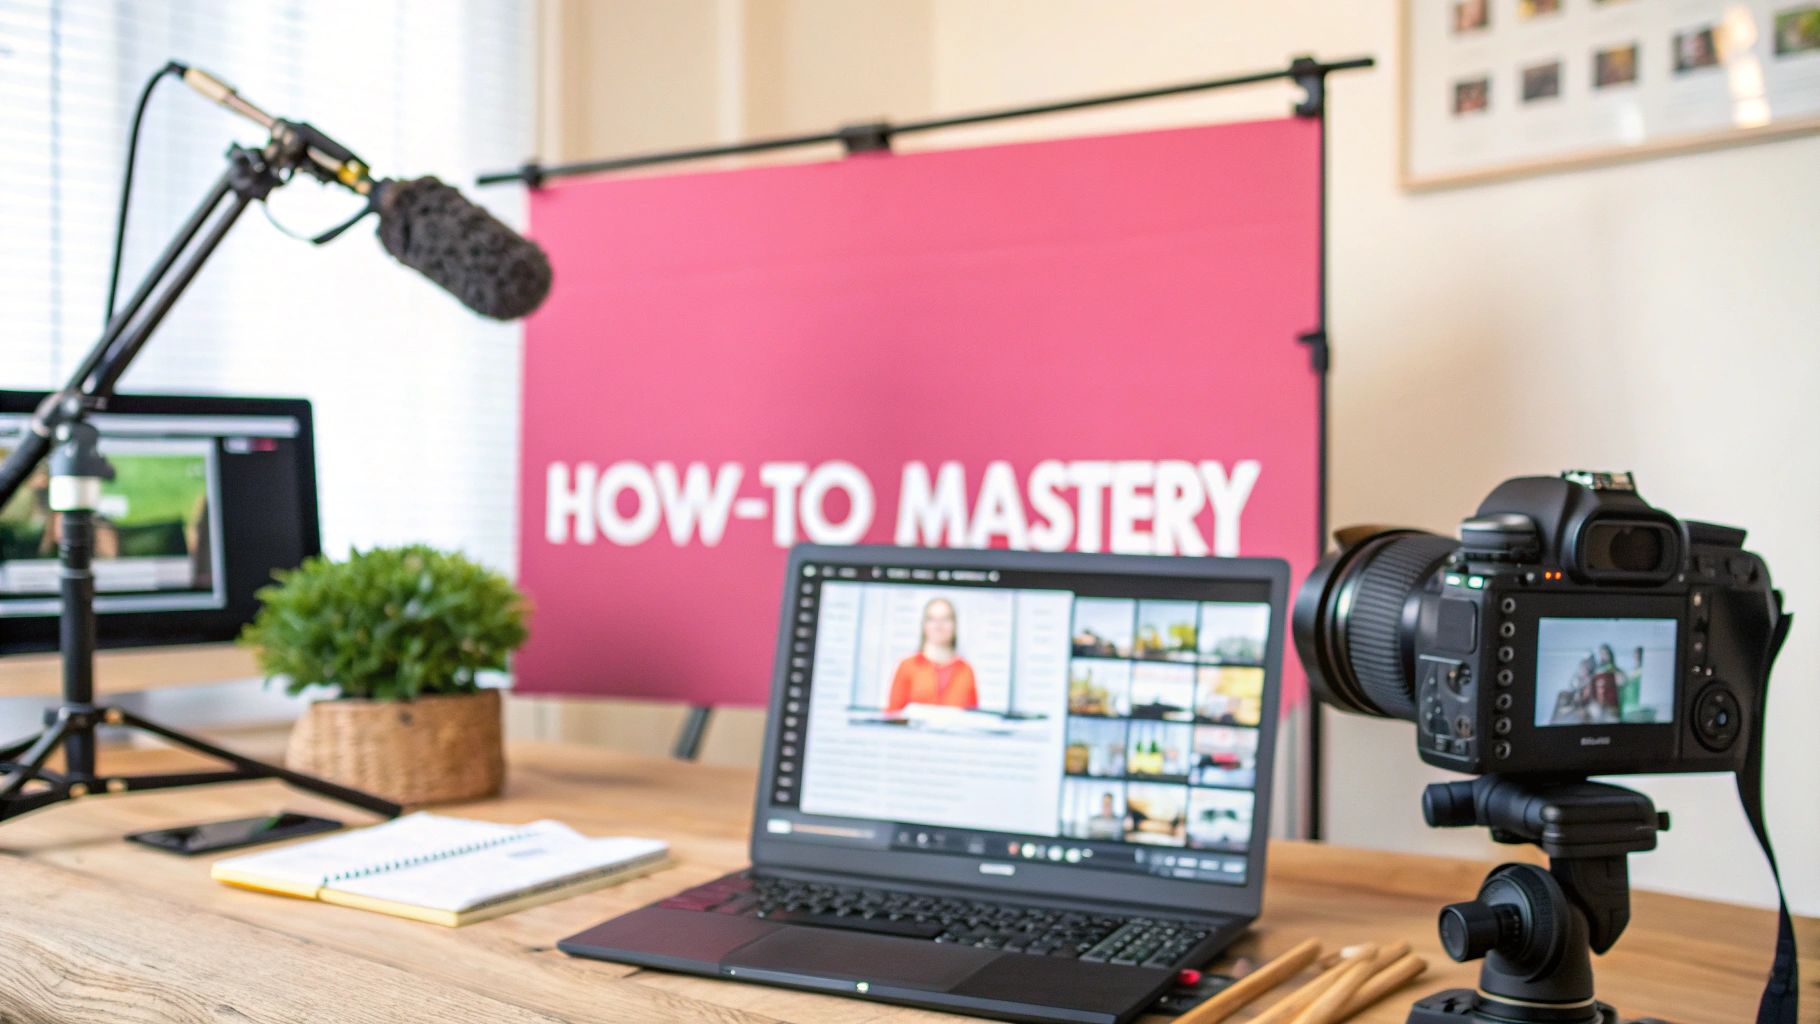
Your Essential Gear and Filming Setup Guide
Let’s get one thing straight right away: you absolutely do not need a professional film studio to create how-to videos that look sharp and polished. While a big budget is nice, it’s the smart choices you make with a few key pieces of gear that really make a difference. In fact, the smartphone in your pocket is probably your most powerful starting tool.
The goal here isn't to mimic a Hollywood production. It's to craft a clean, clear, and distraction-free viewing experience that lets your expertise take centre stage. Seriously, focusing on good lighting and crisp audio will have a much bigger impact than dropping thousands on a fancy camera you don’t know how to use.
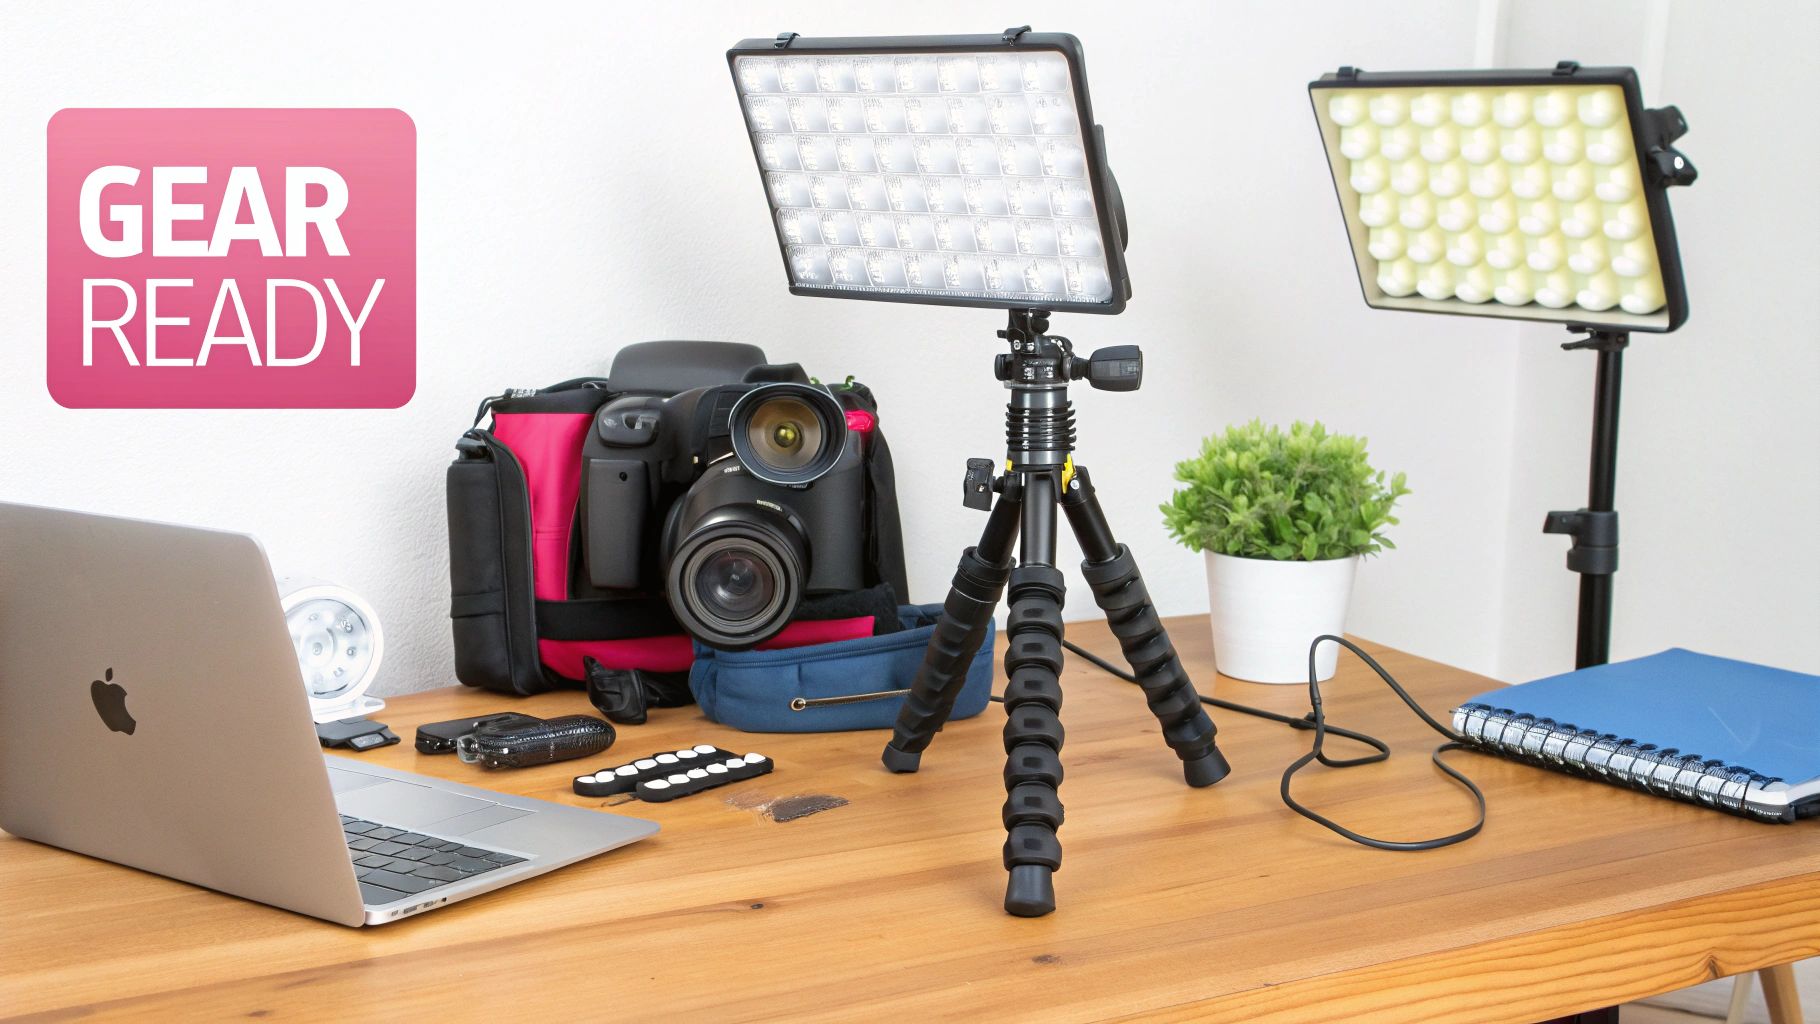
Choosing Your Core Equipment
When you're first gearing up, the sheer number of options can feel overwhelming. But honestly, you only need to nail three core areas to get fantastic results: video, audio, and lighting. Everything else is just a bonus.
Your budget will naturally steer your decisions, but it's crucial to think about where to invest first. Excellent audio is completely non-negotiable. I've seen it time and time again—viewers will forgive slightly grainy video, but they’ll click away in a heartbeat if they can't hear you clearly.
- Camera: The camera on any modern smartphone is likely more than capable. They shoot in high definition and are incredibly simple to operate. If you do have some budget to play with, a DSLR or mirrorless camera will give you more creative control and that sought-after cinematic look.
- Microphone: Whatever you do, never rely on your camera's built-in microphone. A simple lavalier (lapel) mic that clips onto your shirt is a cheap and effective way to capture clear vocals. A USB microphone is another brilliant option if you're recording at a desk, say for a software tutorial.
- Lighting: Good lighting is what separates amateur-hour videos from professional-looking content. Natural light pouring in from a window is a fantastic free option. If that's not consistently available, a simple ring light or a couple of small LED panels can create soft, flattering light that wipes out harsh shadows.
Key Insight: Your very first investment should always be a dedicated microphone. Clear audio builds trust and keeps your audience hooked, while poor audio is the fastest way to lose them for good.
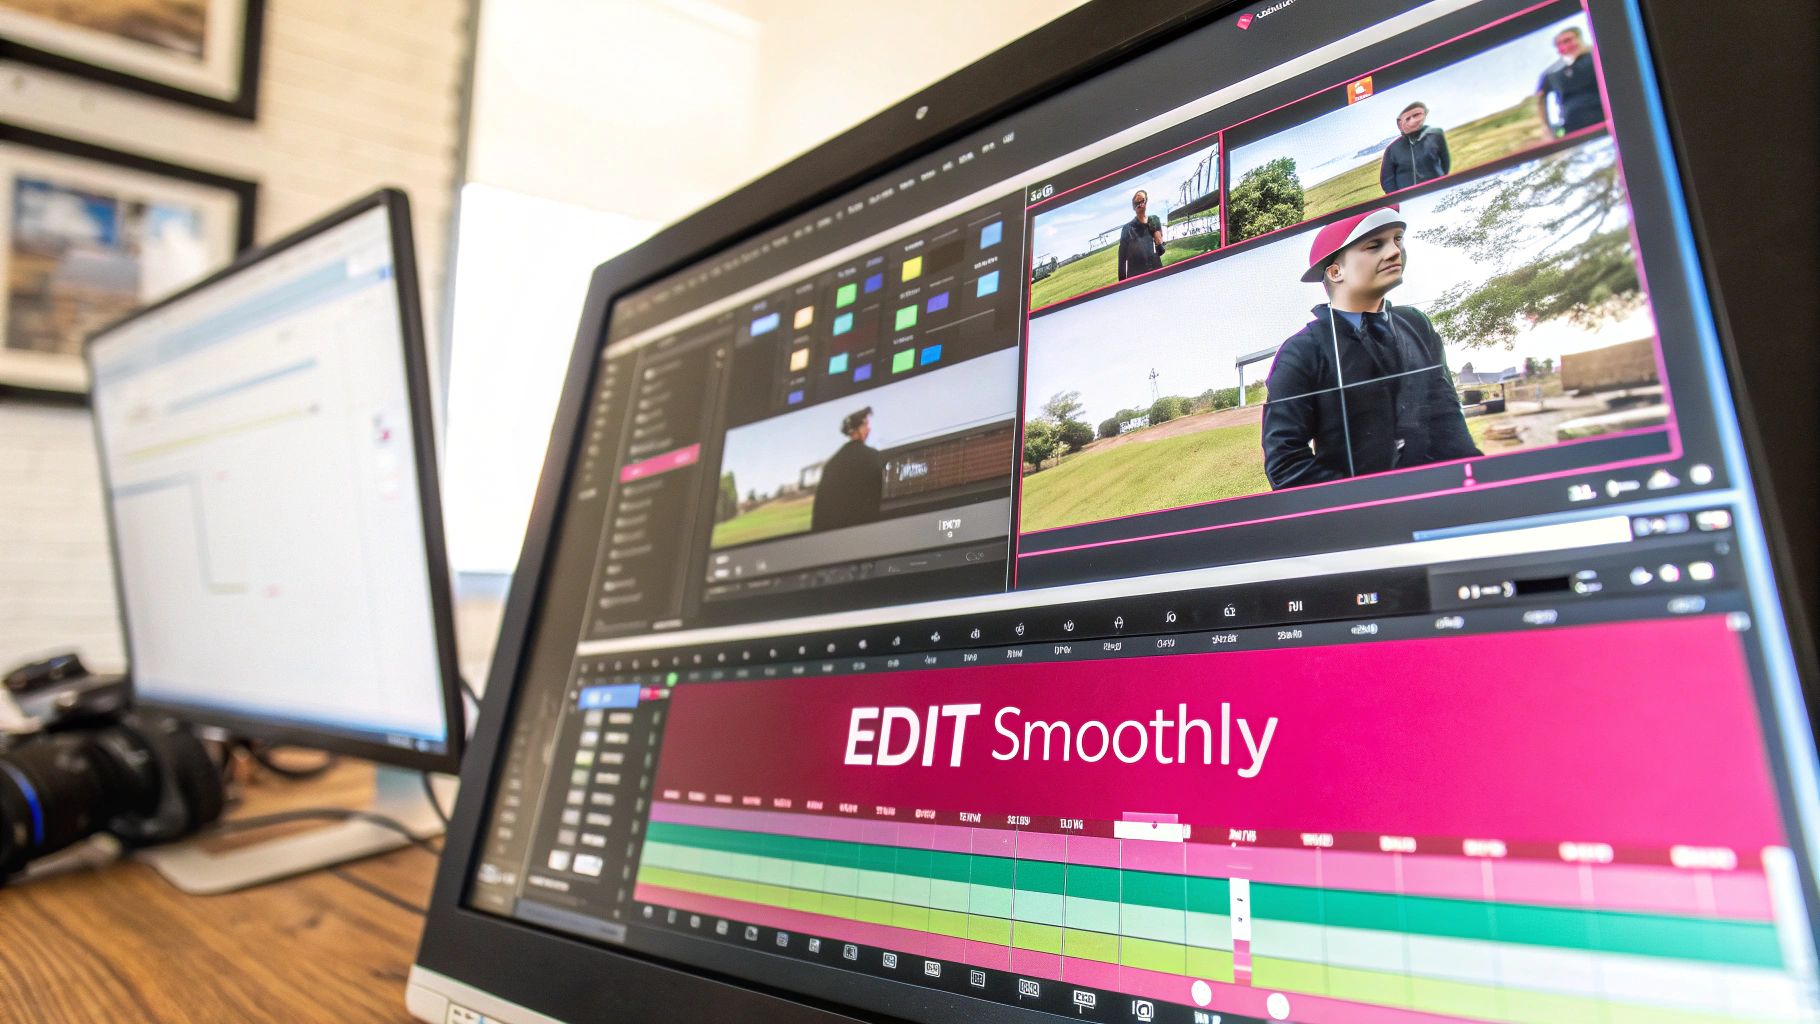
Getting your gear sorted is important, but don't forget what happens before you press record. This image lays out a simple workflow for scripting—a vital step that ensures you’re organised before the cameras even start rolling.

As you can see, finalising your script is a critical preparatory step. It ensures your production runs smoothly and efficiently, saving you a world of headaches in the editing room.
To help you decide where to start, here’s a quick breakdown of your equipment options based on different budget levels.
Starter Kit Equipment Comparison for How-To Videos
Remember, you can always upgrade your kit over time. The most important thing is to start with a setup that allows you to produce clear, watchable content.
Preparing Your Filming Environment
Your filming space is every bit as important as your equipment. A cluttered or noisy background is a massive distraction that pulls viewers away from your message and makes your content feel unprofessional. You want to create an environment where your audience can focus completely on what you're teaching.
First up, choose your background. It doesn't need to be fancy—a clean wall, a tidy bookshelf, or a simple backdrop can work perfectly. A mortgage broker filming in a professional-looking office makes sense. A car detailer shooting in a clean, organised garage adds authenticity. The key is to ensure the background is relevant and not distracting.
Next, tackle the sound. Even with a brilliant microphone, you have to minimise ambient noise.
- Close all windows and doors to block out traffic and neighbourhood sounds.
- Switch off any fans, air conditioners, and humming appliances.
- Give your family or colleagues a heads-up that you're recording to avoid interruptions.
- Soften the room. Soft surfaces like rugs, curtains, and furniture are great for absorbing echo.
Taking a few minutes to create a quiet, controlled space lets your high-quality microphone do its job properly. This prep work costs nothing but dramatically improves the final quality of your how-to video, signalling to your audience that you value their learning experience.
Filming and Editing Techniques That Keep Viewers Hooked
Shooting great raw footage is a fantastic start, but it’s just that—a start. The real magic happens in post-production. This is where you transform a simple recording into a polished, effective how-to video that people actually want to watch.
It's in the edit that you truly shape the visual journey. It’s about so much more than just showing the steps; it's about making those steps dynamic, clear, and easy to follow. By focusing on a few core filming and editing principles, you can create a tutorial that doesn't just teach but also holds your audience's attention right to the very end.
Compose Your Shots for Ultimate Clarity
How you frame your shots has a massive impact on how easily your audience can follow along. Your number one goal here is clarity. So, before you even think about hitting record, take a moment to consider the most effective way to show the action.
Think about these essential camera angles:
- The Wide Shot: This sets the scene. If you're a car detailer, this might be a shot of the entire car before you begin. For an accountant, it could be their whole desk setup, showing the various documents they'll be working with.
- The Medium Shot: This is your go-to shot, usually framing you from the waist up. It’s perfect for those direct-to-camera moments when you're explaining a concept.
- The Close-Up Shot: This is where you get into the nitty-gritty. Use it to show a specific button being clicked in a software demo, a single line item on a form, or the precise way to hold a tool.
Mixing these shots up keeps your video visually engaging and, more importantly, directs the viewer's focus exactly where it needs to be. You could start with a medium shot to explain a concept, then cut to a close-up to demonstrate the action.
Seamlessly Integrate Screen Recordings
For many businesses, especially those in software or professional services, screen recordings are non-negotiable. When done right, they offer a crystal-clear, over-the-shoulder view that makes even the most complex digital processes feel simple.
When you’re recording your screen, make sure to zoom in on the specific area of action. Nobody wants to see your cluttered desktop. Your viewers on mobile will definitely thank you, as they won't have to squint to see what you're clicking. You can see how this focus on clarity adds value by looking at top-tier video testimonial examples, where direct communication is always the priority.
A rookie mistake is to just record your screen while you talk over it. A much better approach is to record your audio and video separately. This gives you the freedom to edit the screen recording to perfectly match your narration, cutting out any mistakes or slow-loading pages for a much tighter, more professional video.
The Editing Fundamentals That Matter Most
Your editing software is where the story truly comes together. The tools can seem overwhelming at first, but if you focus on a few key techniques, you can make a huge impact on viewer engagement and comprehension.
Pacing and TrimmingYour first job as an editor is to be ruthless. Seriously. Trim all the "ums," "ahs," and long, awkward pauses from your talking-head footage. Cut out any moment where nothing important is happening on screen. This creates a much faster, more engaging pace that shows you respect your audience's time.
Text Overlays and GraphicsUse on-screen text to reinforce key points. A simple text overlay can highlight a keyboard shortcut, define a tricky technical term, or list the steps you’re about to cover. This is a massive help for visual learners or people watching with the sound off.
The Right Background MusicSubtle background music can do wonders for setting the tone and adding a layer of professionalism. Choose instrumental tracks that match the mood of your video—something upbeat for a quick tip, or calm and focused for a more detailed tutorial. Just make sure the volume is low enough that it never overpowers your voice.
In Australia, businesses are getting smarter about how they create how-to videos, shifting away from one-off shoots. While traditional rates might start at AUD 100 per hour, companies that embrace a more scalable production framework are slashing costs by around 40% and churning out way more content. By focusing on efficient in-house processes, creators are making quality instructional videos much more accessible.
Publishing and Promoting Your Video for Maximum Reach
So you’ve created a brilliant how-to video. That's a huge achievement, but let’s be real—it's only half the job. Now you have to get people to actually see it. Publishing isn’t just about hitting the "upload" button; it’s a strategic process you need to nail to give your video the best possible chance of finding its ideal audience.
The goal here is to turn this one piece of content into a genuine, long-term asset. One that keeps driving traffic and building your brand authority for months, or even years, to come. Let's get into how you can publish and promote your work for some serious impact.
Optimise Your Video for YouTube Search
It helps to think of YouTube as the world's second-biggest search engine. Just like with Google, you need to give the platform all the right signals so it understands what your video is about and who it should show it to. This is often called YouTube SEO, and it's absolutely crucial for getting discovered.
First up, your video title. It needs to be compelling, but more importantly, it has to contain the exact keywords your audience is searching for. If you're a mortgage broker, a title like "How to Understand Your Closing Costs in Australia (A Simple Guide)" is going to work much harder for you than a generic "Closing Cost Explained."
Your video description is just as vital. Those first few lines are critical because they show up in search results. Use that precious space to summarise the video and include your main keyword. After that, write a detailed description that gives more context, adds timestamps for key sections, and includes links to helpful resources on your website.
Finally, don't forget to add relevant tags. Brainstorm all the different ways someone might search for your video. You'll want a mix of broad terms (like "mortgage tips") and super-specific ones ("first home buyer closing costs Sydney"). This is what helps YouTube’s algorithm connect your video with the right eyeballs.
Design a Custom Thumbnail That Demands Clicks
Think of your video's thumbnail as its personal billboard. When you’re floating in a sea of search results, a great thumbnail can be the single thing that convinces someone to click on your video instead of a competitor’s. You should never, ever settle for the auto-generated options YouTube offers.
A strong thumbnail usually has:
- A Clear, High-Quality Image: A shot of your face making eye contact often works wonders. It builds an instant human connection.
- Bold, Easy-to-Read Text: Add just a few words that scream the video's core promise or benefit. Make sure the font is big enough to be easily read on a tiny smartphone screen.
- Contrasting Colours: Use bright, bold colours that pop against YouTube's interface (which is mostly red, white, and black).
Your thumbnail and title work together as a one-two punch. The title makes a promise, and the thumbnail visually confirms it. Get this combination right, and you'll see your click-through rate soar.
Promote Your Video Across Your Digital Ecosystem
Don't just leave your video on YouTube and cross your fingers. To squeeze every last drop of value from your creation, you need to push it out across every channel you own. This is how you turn one asset into a multi-platform marketing machine.
For Australian creators, this strategy is particularly powerful. YouTube is the undisputed hub for how-to content, with viewers spending an average of 17.1 hours per month on the platform. With a potential ad reach of 20.9 million people, it’s clear that YouTube is where Australians go to learn. By using this as your home base and then sharing your content elsewhere, you tap into a massive, engaged audience that's hungry for your tutorials. If you want to dive deeper into these trends, you can explore the latest Australian YouTube usage statistics.
Here’s how to amplify your reach:
- Embed it in a Blog Post: Write an article that expands on the video's topic. Then, embed the video right there in the post. This adds huge value for your blog readers and can give its search rankings a nice little boost.
- Share it With Your Email List: Your email subscribers are your warmest audience. Send them a dedicated email announcing your new video and spelling out what they’ll learn from it.
- Promote on Social Media: Chop up your video into short, punchy clips or share some behind-the-scenes moments on platforms like Instagram, LinkedIn, and Facebook. Always, always include a link back to the full video on YouTube.
Once your video is out in the wild, you'll find its reach is tied to your broader promotional efforts. For a more comprehensive approach to growing your audience, it's worth learning about other effective methods on how to get more website traffic. By creating this ecosystem around your video, you signal to search engines that your content is valuable, which leads to better rankings and more organic traffic over the long haul.
Your Top Questions About Making How-To Videos Answered
As you start diving into how-to videos, questions are bound to bubble up. It's one thing to read about the process, but actually doing it is a whole different ball game. Getting bogged down by small uncertainties can really kill your momentum.
So, let's tackle some of the most common questions that come up when people start making instructional videos. The idea here is to give you quick, practical answers to get you over any humps and keep you creating.
What’s the Ideal Length for a How-To Video?
This is the classic question, and the honest-to-goodness answer is: as long as it needs to be, and not a second longer. There isn't a magic number that fits every topic. A video on tying a specific knot might only need to be 90 seconds, while a deep dive into complex software could easily be 15 minutes.
The real secret is efficiency. Your viewer has a problem, and they've come to you for the solution. Your job is to get them there without any detours or fluff.
Instead of obsessing over the clock, ask yourself this: "How can I deliver maximum value in the shortest amount of time?" Edit ruthlessly. If a shot, a sentence, or a graphic doesn't directly help the viewer learn, cut it. Respect their time, and they'll reward you with their trust.
Do I Really Have to Be on Camera?
Not necessarily, but it definitely helps. When you show your face, you create an instant human connection. It helps build credibility and makes you seem more like a real, approachable expert. After all, people connect with people, not just disembodied voices.
That said, if the thought of being on camera fills you with dread, it might do more harm than good. Your discomfort can be surprisingly obvious and might distract your viewers from the actual lesson.
If you're not ready for your close-up, consider these alternatives:
- Voice-over with B-roll: Record your voice clearly and pair it with high-quality footage of the process you're showing.
- Animated explainers: These are brilliant for breaking down abstract ideas or processes that are a pain to film in real life.
- Screen recordings: For any kind of software or app tutorial, a crisp screen recording with clear narration is often the best way to go.
You might find your confidence grows over time. A great way to ease into it is by starting and ending your video with a quick on-camera intro and outro, keeping the main tutorial as a voice-over.
How Can I Make Videos on a Shoestring Budget?
You absolutely do not need a Hollywood budget to get started. The idea that you need expensive gear is one of the biggest myths that stops people from ever pressing record. It’s all about being resourceful.
Here’s how you can create great content without emptying your wallet:
- Use Your Smartphone: The camera in your pocket is a powerhouse. Modern smartphones shoot incredible high-definition video that's more than good enough.
- Focus on Audio: This is non-negotiable. Bad audio is far more distracting than less-than-perfect video. Invest in an inexpensive lavalier (lapel) mic – it will make a world of difference.
- Find the Light: Natural light is your best friend, and it’s free. Film near a window to get soft, flattering light that looks professional.
- Use Free Editing Software: There are amazing free tools out there. DaVinci Resolve for desktop and CapCut for mobile are both packed with powerful features.
Remember, the quality of your teaching will always trump the cost of your camera.
How Do I Get People to Trust My Advice?
Trust isn't built in a day, but you can definitely speed up the process by being authentic and transparent. People are looking for guidance from someone who is not only knowledgeable but also relatable. Don't be afraid to share a mistake you made or a hurdle you had to overcome. It makes you human, and that builds trust.
Another powerful tool for building credibility is social proof. When potential customers see that real people have benefited from your expertise, it gives them the confidence to trust you, too. You can learn more about how to get video testimonials from customers to feature on your site. Showcasing genuine success stories provides undeniable proof of your value.
We've covered some of the big questions, but you might have more specific ones. Here's a quick rundown of other common queries.
Frequently Asked Questions About How-To Video Creation
Hopefully, these answers clear up some of the initial hurdles and give you the confidence to start creating. The most important step is simply to begin.